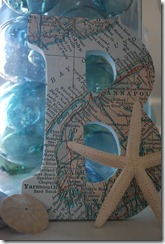
 The ladies at Thistlewood Farm, It All Started With Paint, Eclectically Vintage, The Cottage Market, and The Space Between are having another great blog party today called It’s a Cinch. The premise – do an easy-peasy project that you can finish quickly and with minimal effort.
I’m sure this project took way longer than it should have. But thanks to my {1} inability to focus on one thing for more than five minutes, {2} habit of making things 20 times more complicated than they need to be, and {3} an ingrained need for perfection, everything I do takes longer than it should. {Have I mentioned that I’m a little on the OCD side? Picture Sheldon on The Big Bang Theory with boobs. Yep, that’s me.} So overall, I probably spent a few hours creating creating my map letters {not including waiting time between a couple of steps}. But it was super-easy to do.
This is my It’s a Cinch project inspiration:
 From Stylish Living Catalogue 2010
I had already bought white wood letters at Michaels for 50% off {I think they were around $3.50 each} I totally forgot to take a “before” picture of them – DOH! I bought the letters B E A C H. These are somebody else’s letters that look just like mine…
 via lazy mondays
When I saw the PARIS map letters on Pinterest, I was like, YEAH, now I know what to do with the letters! So I searched the Net for some maps of beaches that I’ve been to. Originally I was going to do use a separate map for each letter, but then I came across this whopper map of the Maritimes:

I like the soft colours and old look to the map. And after I printed it out on 16 sheets of 8-1/2” x 11” paper, I realized I could fit each letter onto an area of the map that I’ve been to – PEI, Cape Breton, and three other areas in Nova Scotia {including my beloved Lunenburg region}.

Once I figured out where I wanted each letter to go, I cut each section from the original map image on my computer and printed each one out on its own sheet of paper. That way, I wouldn’t have to cut off the white borders and try to match up seams between sheets of paper.
 Map section for the letter B
Next, I traced around the letters and cut them out.


I painted the sides of all the letters a light bluey-green. I realize now that I didn’t get any good pictures of the painted letters. DOH again! Anyway, after the paint dried, I used Mod Podge to attach each map letter onto each wood letter. And voila, Maritime map letters!
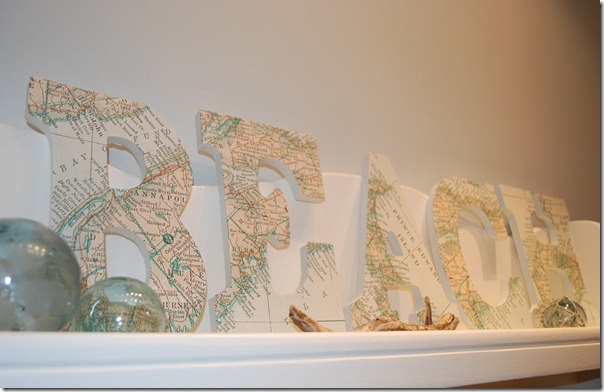
I used a little creative license with the A – I turned PEI about 70 degrees so I could fit more of of the island onto the letter.

And I made sure to fit my very favourite part of the Maritimes onto one of the letters – this is the Lunenburg region in Nova Scotia on the letter E:

I still haven’t completely finished the letters – I don’t know if I want to seal them with Mod Podge or the spray sealer that I use on my paintings. And I have to decide where to hang them too.
And there you go, an easy-peasy It’s a Cinch project! If you want to create your own map art, there are some great ideas at Your Decorating Hotline. And check out Jason LaFerrera for a completely different & amazing take on map art.
Don’t forget to do the rounds at Thistlewood Farm, It All Started With Paint, Eclectically Vintage, The Cottage Market, and The Space Between to see more It’s a Cinch projects :-)

Also linking up to Nifty Thrifty Tuesday at Coastal Charm ‘cause these babies are definitely coastal! And pretty nifty too, if I do say so myself :-)




 Posts
Posts


![Signature 2[3]](https://blogger.googleusercontent.com/img/b/R29vZ2xl/AVvXsEgS-hkbufkETfEffCrNVtKlfu7pTiCbnEPY4Y4qBBh3NuALoTznQIBpJXpjxtLaI1865GmJFbO49FU2XMIR6n3mW4UGOcxsPupfB8HwaFtnKbIdY_ZYetjvdpA-tveRy8xl9frT20Dfpn0/s1600-h/Signature%2525202%25255B3%25255D%25255B3%25255D.png "Signature 2[3]")


